
Phosh has support for plugins which can be used to customize and extend certain aspects as per your liking without touching the internal source code.
Currently Phosh supports plugins for lock-screen and quick-settings. Lock-screen plugins appear when your phone is in locked state. Plugins here can be used to show information that doesn’t need one to unlock the screen. Examples include emergency information, upcoming events etc.
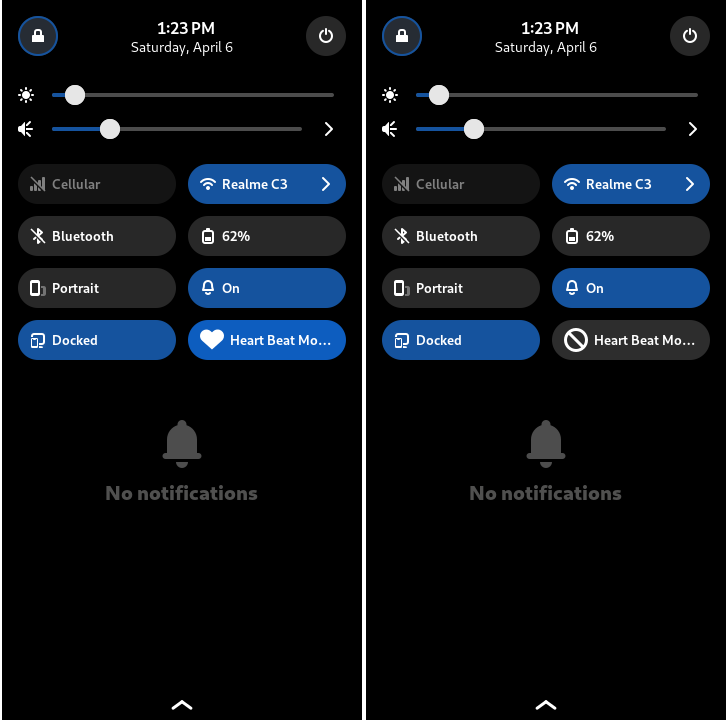
Quick-setting plugins are found in the quick-settings box (the one where Wi-Fi, Bluetooth etc. can be toggled) when you drag the top-panel. Plugins here can be used to toggle an action like activate caffeine mode.
Read on to learn how to create a plugin and use it.
Plugins, Extensions - What is What? Link to heading
People usually confuse between these two words. For our usecase, an extension is a user interface element that extends the functionality of something. A plugin is a collection of extensions, like a package.
As an example, suppose we have a plugin to monitor heart-beats, then it can provide two extensions - a quick-setting to enable and disable the tracker and a lock-screen extension to show the analytics collected so far.
Prerequisites Link to heading
Phosh plugins are usually written in C1 and are similar to typical Gtk widgets. It means you should be familiar with C, Gtk and GLib based libraries.
You can read our Development Guide - Getting Started for more information. Especially the Running Phosh section as it is highly useful to test your plugins.
Getting Started Link to heading
With the requirements set, let us see how to develop a plugin.
phosh-plugin.h
(can be located via pkg-config --cflags --libs phosh-plugins) to develop plugins
without cloning Phosh repository.First you should clone the Phosh repository and get it running.
Phosh comes with a sample quick-setting plugin to give an overview of what your
plugin should contain. Head over to
plugins/simple-custom-quick-setting
directory and copy it to a new name under the plugins/ directory.
For example, if you are creating a new quick-setting plugin named heart-beat-monitor,
then you should have copied plugins/simple-custom-quick-setting to
plugins/heart-beat-monitor.
Next, you should rename all occurrences of simple-custom-quick-setting (and
variations) with your plugin’s name in the files inside plugins/heart-beat-monitor.
Plugin Files Link to heading
Let’s have a short look at what each file in your plugin does.
meson.build- It is a Meson build file.
- If your plugin has an external dependency apart from what Phosh uses, then you should set it here.
simple-custom-quick-setting.desktop.in.in- This file provides the metadata of your plugin.
- You should replace
NameandCommentkeys with your plugin details. - The
Typeskey describes what extensions the plugin supports. Example values arelock-screen;,quick-setting;,lock-screen;quick-setting;.
qs.ui- It is a UI file.
- For a lock-screen extension, it can be any valid Gtk widget.
- However, quick-settings should stick to the structure and modify only the properties available.
phosh-plugin-simple-custom-quick-setting.gresources.xml- This file lists the resources used by your plugin.
- One obvious resource is the UI file described above.
- If your plugin needs other resources like icons, CSS files etc. then it should be described here.
phosh-plugin-simple-custom-quick-setting.c- This is the entry file used to describe the plugin to the loading mechanisms.
- You should include your plugin headers.
- Change
PHOSH_TYPE_SIMPLE_CUSTOM_QUICK_SETTINGto your plugin’s, likePHOSH_TYPE_HEART_BEAT_MONITOR. - Change the extension point to match what extensions your plugin provides.
simple-custom-quick-setting.hsimple-custom-quick-setting.c- The above two files form the core of your plugin.
- Just like the UI file, if you are making a lock-screen extension, then it can be any Gtk widget.
- For quick-settings, it should stick to the available properties.
The above description can be confusing or vague. Worry not, have a look at the source code of other plugins. It should give you an idea of what to replace, what to modify etc. If you still have doubts, feel free to reach us using Matrix.
If you have followed the above steps, then a quick-settings plugin for heart-beat monitoring
would have its on_clicked method like the below code.
static void
on_clicked (PhoshHeartBeatMonitor *self)
{
  gboolean active = phosh_quick_setting_get_active (PHOSH_QUICK_SETTING (self));

  if (active) {
    phosh_status_icon_set_icon_name (self->info, "action-unavailable-symbolic");
    phosh_status_icon_set_info (self->info, _("Heart Beat Monitor Inactive"));
    /* Inform the sensor to pause monitoring… */
  } else {
    phosh_status_icon_set_icon_name (self->info, "emblem-favorite-symbolic");
    phosh_status_icon_set_info (self->info, _("Heart Beat Monitor Active"));
    /* Inform the sensor to start monitoring… */
  }

  phosh_quick_setting_set_active (PHOSH_QUICK_SETTING (self), !active);
}
Testing Link to heading
Adding the Plugin to Phosh’s Build System Link to heading
To use the plugin in Phosh, you need to add it to the build system, so it can compile, build the resources and do other configurations such that it can be loaded by Phosh.
Open
plugins/meson.build
and if you scroll below, you will see lines similar to the following.
lockscreen_plugins = [
  'calendar',
  'emergency-info',
  'launcher-box',
  'ticket-box',
  'upcoming-events',
]

quick_setting_plugins = [
  'caffeine-quick-setting',
  'simple-custom-quick-setting',
]
Depending upon what your plugin does, add it to any of the two lists. In our example, this will be equivalent to the below snippet.
quick_setting_plugins = [
  'caffeine-quick-setting',
  'simple-custom-quick-setting',
  'heart-beat-monitor',
]
Now, the plugin will be built whenever we build Phosh.
Standalone Testing Link to heading
In a standalone testing, you only load the set of extensions. It is useful for a quick testing if your plugin doesn’t need Phosh to be running.
- Enable tools support.
$ meson configure _build -Dtools=true
- Compile Phosh and plugins.
$ meson compile -C _build
- Load the extensions.
# For lock-screen extensions
$ G_MESSAGES_DEBUG="phosh-plugin-heart-beat-monitor" _build/tools/run_tool _build/tools/widget-box
# For quick-settings extensions
$ G_MESSAGES_DEBUG="phosh-plugin-heart-beat-monitor" _build/tools/run_tool _build/tools/custom-quick-settings
Now a window should pop-up where you can test your plugin.

G_MESSAGES_DEBUG=phosh-plugin-heart-beat-monitor shows you the debug messages
logged by your plugin named heart-beat-monitor.
Testing with Phosh Link to heading
You should be able to test your plugin locally without having to mess up your system configuration. In the following, we locally install Phosh, set the plugins and then run Phosh.
- Change the installation prefix.
$ meson configure _build -Dprefix="/home/user/phosh/install/"
This asks Meson to use /home/user/phosh/install/ as the directory to install
Phosh. Feel free to replace it with any absolute path you like.
- Compile and install Phosh and the plugins.
$ meson compile -C _build
$ meson install -C _build
- Set the plugin as enabled.
$ GSETTINGS_SCHEMA_DIR=_build/data \
  GSETTINGS_BACKEND=keyfile \
  gsettings set sm.puri.phosh.plugins quick-settings "['heart-beat-monitor']"
We ask GSettings to enable the quick-settings plugin named heart-beat-monitor.
Actually, we are setting heart-beat-monitor as the only enabled
quick-settings. It should simplify the testing by loading only your plugin.
For lock-screen extensions use the lock-screen key.
GSETTINGS_SCHEMA_DIR=_build/data asks GSettings to load the schema from
_build/data directory.
GSETTINGS_BACKEND=keyfile saves the value to
$HOME/.config/glib-2.0/settings/keyfile instead of messing up system settings.
- Run Phosh.
$ G_MESSAGES_DEBUG=phosh-plugin-heart-beat-monitor \
  GSETTINGS_SCHEMA_DIR=_build/data \
  GSETTINGS_BACKEND=keyfile \
  phoc -C /usr/share/phosh/phoc.ini \
       -E "PREFIXDIR/libexec/phosh -U"
You might have to replace phoc -C /usr/share/phosh/phoc.ini with your local
Phoc executable and configuration.
G_MESSAGES_DEBUG=phosh-plugin-heart-beat-monitor shows you the debug messages logged by
your plugin named heart-beat-monitor.
Change PREFIXDIR to the prefix you set in step 1.
Now Phosh should be launched where you can test your plugin.
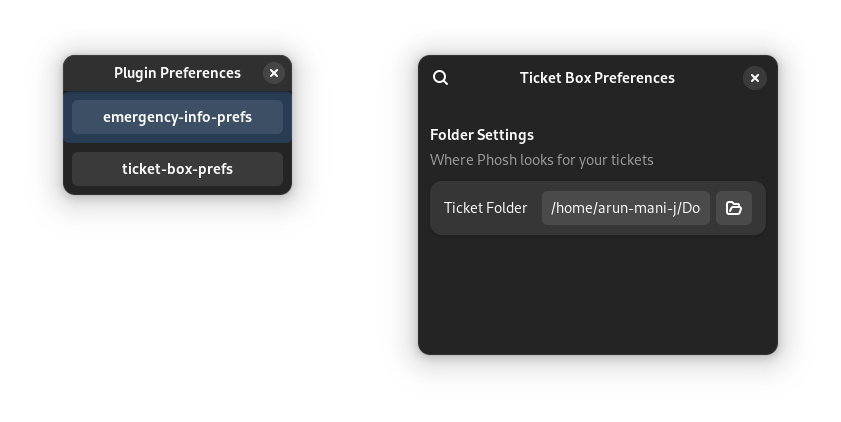
Preferences Link to heading
Plugins can have preferences which show up in Phosh Mobile Settings. This has two benefits. As a plugin developer, you need not worry about making preferences UI part of any extension (like where to place the settings button, should preferences be a pop-up or separate application etc.). For a user, they have a unified, standard portal to browse and configure all their plugins.
To keep the article concise, we have decided to explain more about preferences
in a future article. But for the curious, have a look at
/plugins/ticket-box
to get an idea of how to create preferences for your plugin.
Similar to how we test plugins, you can test plugins using plugin-prefs.
$ G_MESSAGES_DEBUG="phosh-plugin-prefs-ticket-box" _build/tools/run_tool _build/tools/plugin-prefs
This should launch a standalone that can be used to test Ticket Box plugin.
Wrapping Up Link to heading
Once your plugin is ready, you can package it and distribute it. If the plugin is for general users, then you can open up a merge request to make it part of Phosh itself.